How to Properly Install Lighting Fixtures and Replace Wiring

How to Properly Install Lighting Fixtures and Replace Wiring
Installing a light fixture at home can seem daunting, especially if you’re new to wiring. Since wiring involves electricity, which can be dangerous, it's important to approach the task with care. By taking basic precautions and understanding the fundamentals of circuits and the wiring involved, you can make the process safer and more manageable. With products from Hua Wei Industrial, wiring and installing new light fixtures becomes not only easier but also safer, allowing you to complete your project with confidence.
Task 1: Removing the Old Fixture
Step 1 - Cut Off the Power to the Circuit:
The best way to do this is by turning off the power at the circuit breaker (also known as the fuse box). Switch the breaker for the circuit supplying power to the fixture to the "Off" position. You can confirm whether the circuit has been successfully cut off by checking if there is still current. If the bulb lights up when switched on, it means the circuit is still live; if the current has been cut off or disabled, the bulb should not light up. Always ensure the power is off before proceeding to remove the old fixture.
Step 2 - Clear the Old Fixture and Keep the Surrounding Installation Area Clean:
If the fixture you need to wire is located on the ceiling, you should clear away any cobwebs and dust before attempting to install a new fixture. Similarly, clean and organize the area around wall-mounted lights or switches, as a clean workspace will make the installation process easier. If you need to use a ladder to reach the fixture’s wiring, or if you are working in less-than-ideal conditions, ensure there are no debris, obstacles, or other objects around that could affect your balance or safety.
Step 3 - Remove the Fixture Cover:
For example, if the fixture has a decorative globe, protective cover, or any item covering the existing fixture, such as ceiling fan blades, these should be removed first to avoid interference with the wiring process.
Step 4 - Loosen the Mounting Bracket Screws:
Fixtures are typically secured with a mounting bracket. You can use a Phillips screwdriver to unscrew it from the bracket and then pull it away. When unscrewing the old mounting bracket from its base, make sure to support it with your hand to prevent it from falling directly to the floor once the screws are loosened.
Step 5 - Gently Lower the Mounting Bracket:
Support the bracket with one hand and slowly lower it a few centimeters below the mounting base. You should see three wires connected underneath: the hot wire, ground wire, and neutral wire. Use your free hand to disconnect the wires, which may be connected with wire nuts or electrical tape. You might need to twist to loosen the wires or use a tool to remove the tape, separating the wires from each other.
Step 6 - Disconnect the Fixture from the Wiring:
You will usually find that two wires are connected using wire nuts or electrical tape - one coming from the fixture itself and the other from the main circuit. You need to twist off the wire nuts or use a tool to remove the tape, loosening the wires and removing the fixture from the original wiring. Place the fixture in a stable location.
Task 2: Installing the New Fixture
Step 1 - Check Compatibility:
Ensure that the mounting bracket of the new fixture is compatible with the hardware of the old fixture, including screws, dimensions, and specifications, and then install the bracket back in place.
Step 2 - Replace the Mounting Bracket if Necessary:
If the fixture requires a special bracket, it is usually included with the fixture when you purchase it. If not, you can perform a general search using the fixture's name or find it on the packaging or in the instructions, and then install the new mounting bracket accordingly.
Step 3 - Check the Wiring's Condition and Compatibility:
This is especially important for older homes built before 1985. Be cautious of older wiring to avoid more serious issues. Check the wires for signs of aging, cracks, or damage, and ensure the voltage and current are compatible with the new fixture.
Step 4 - Connect the Wires:
Depending on your country or region, the colors of the hot wire, ground wire, and neutral wire may vary. The standard color codes for electrical wiring in different countries are usually as follows. Support the new fixture with one hand, and take each wire from the wall or ceiling of the same color, and connect it to the corresponding exposed wire from the fixture. Common wiring methods include the following:
| CA | UK, EU | US | JP, TW |
|
|
|
|
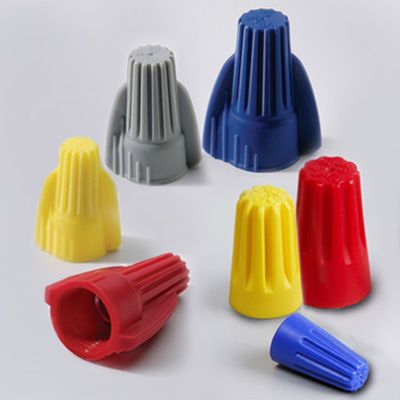
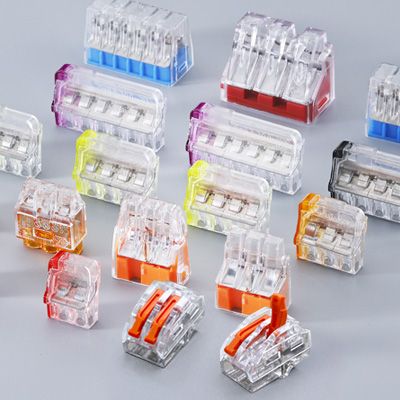
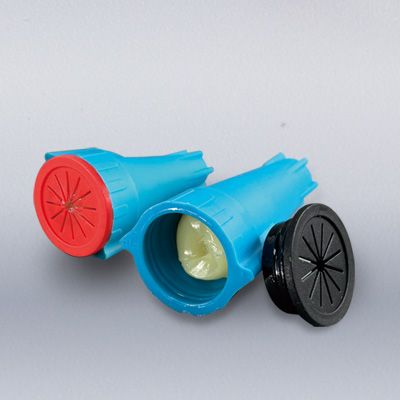
| Most Economical Choice - Wire Nuts | Simplest and Most Time-Saving Choice - Push-In Connectors | Most Weather-Resistant Choice - Waterproof Wire Connectors |
 |
 |
 |
|
|
|
Step 5 - Connect the Ground Wire to the Mounting Base:
If the remaining wire is green, green and yellow, or bare copper, it needs to be attached to the mounting base of the fixture. There may be a small screw on the mounting base that you can slightly loosen, insert the wire into the gap between the screw and the mounting base, and then tighten it to secure the ground wire.
Step 6 - Attach the Mounting Base to the Mounting Bracket:
Continue to support the mounting bracket with your hand, and secure it in place by aligning the screw holes with the holes on the bracket. Then, use the hardware that came with the mounting bracket to screw it into the mounting base.
Step 7 - Install Additional Attachments:
For example, if your fixture requires a lampshade or ceiling fan blades, you may need to add external features or parts. Take the time to ensure that your mounting base is level, properly oriented, and flush with the installation surface. Improper installation can cause your fixture to flicker or function poorly.
Step 8 - Test the New Fixture:
Return to the circuit breaker (fuse box) and reset the power to restore the current. Now, you can turn on the power to the newly installed fixture to test and confirm that the bulb lights up and that there are no abnormal conditions.
Task 3: Common Issues and Troubleshooting Methods
1. Test the Current:
The first scenario is that if the wire is pinched or damaged, it will impair its ability to transmit power to the new fixture. The second scenario is that the contractor might have used wires of different colors for your electrical setup. In both cases, you should use a circuit tester to ensure the wiring is correct, avoiding dangerous mistakes. The circuit tester has two probes—connect one to the problematic wire and the other to the ground wire. If the light on the tester turns on, it means the wire is hot and supplied with electricity.
2.Leave Extra Wire:
If you’re dealing with older wires or the stripped portion of the wire is difficult to work with, you can strip more of the wire after cutting off the power to the circuit, making it easier to handle.
3.Get a Helping Hand for Wiring:
If you have an assistant during the installation, having them support the mounting base will free up your hands for wiring. However, if you don’t have an assistant, especially when wiring ceiling lights, there won’t be anyone to help you stabilize the ladder, hand you tools and parts, or remove unnecessary parts. In such cases, choosing simple, tool-free, twist-free, and solder-free push-in connectors will be very helpful.
Learn more about the latest products, including Push-In Wire Connectors, explore additional Product Specifications, or Contact Us to gain more professional knowledge.
New Product
Featured product
 Hot
Hot
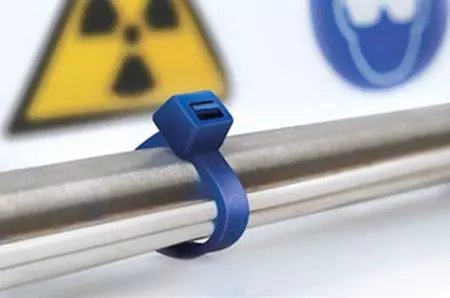
Stainless Steel Ties
Hot
Stainless Steel Ties
With high resistance to various corrosive agents such as acids, alkali, UV, and rust, …
Read More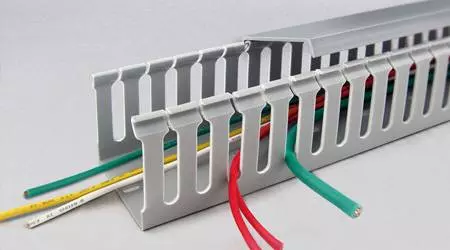 Hot
Hot
Wire Ducts
Hot
Wire Ducts
The premium solution for routing and hiding wires in control panels.
Read More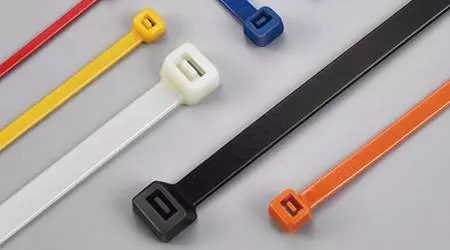 Hot
Hot
Standard Cable Ties
Hot
Standard Cable Ties
Available materials include heat stabilized, weather resistant and flame retardant polymers,...
Read More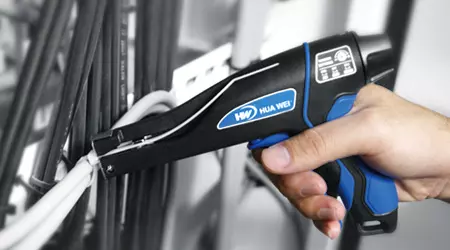 Hot
Hot
(GIT-703) Cable Tie Tensioning Tool
Hot
(GIT-703) Cable Tie Tensioning Tool
The new cable tie installation tool can fasten and cut nylon cable ties quickly & safely
Read More