Wiring and Installation Guide for Junction Boxes
Wiring and Installation Guide for Junction Boxes
When inspecting your home's electrical system, you'll find various components, including cables, outlets, switches, circuit breakers, and an essential box known as the junction box. According to the National Electrical Code (NEC) and local building regulations, the installation of junction boxes is mandatory to ensure the safety and compliance of the electrical system. Reading our Wiring and Installation Guide for Junction Boxes for more expert advice.
Step 1:
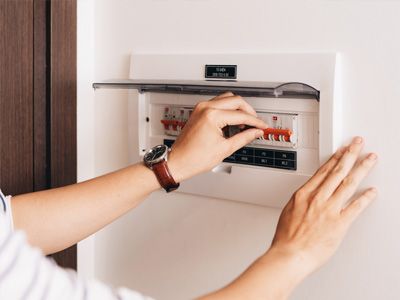
Before you begin the installation, make sure to turn off the power to the circuit you'll be working on. You can do this by switching off the circuit breaker. If there's a light fixture on the circuit, turning it on before shutting off the breaker can help you verify that the power is indeed off - if the light goes out, the circuit is disconnected.
Step 2:
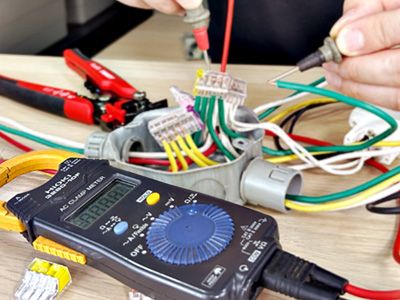
Use a voltmeter or voltage tester to double-check that the wires are truly de-energized. Once you're certain there’s no electrical current, you can proceed to the next step.
Step 3:
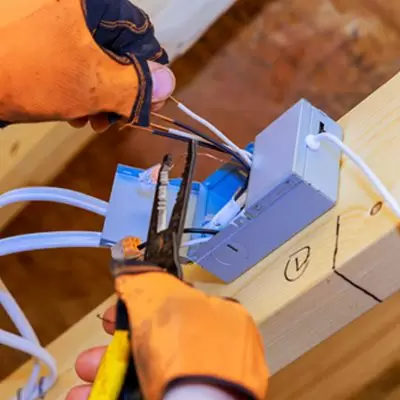
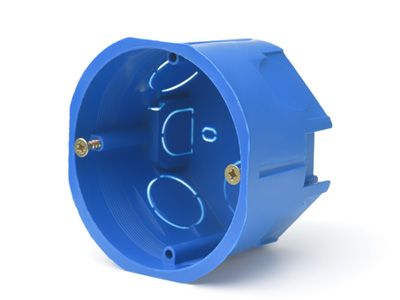
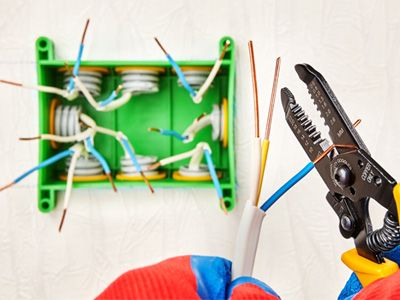
If you're installing an indoor junction box, use screws or steel nail clips to secure the box to a stud, ensuring that the face of the box is flush with the wallboard. For metal junction boxes, use a screwdriver to remove the knockouts on the sides of the box to allow the wires to pass through. Additionally, metal boxes require the installation of cable clamps, which are threaded into the box from the outside. Plastic junction boxes usually come with built-in clamps. The primary function of these clamps is to prevent the cables from shifting or being damaged by external forces inside the junction box.
Step 4:
Feed the cable through the clamps into the junction box. The cable sheath (outer jacket) should extend 6.4 to 12.7 mm (1/4 to 1/2 inch) beyond the clamp into the box, and each individual wire should extend approximately 152.4 mm (6 inches) into the box. If necessary, trim the wires to the appropriate length, and use a wire stripper to remove 19 mm (3/4 inch) of insulation from the end of each wire. Tighten the clamp screws to secure the cable, being careful not to overtighten and damage the cable. Plastic boxes usually have spring clips that do not require additional tightening.
Step 5:
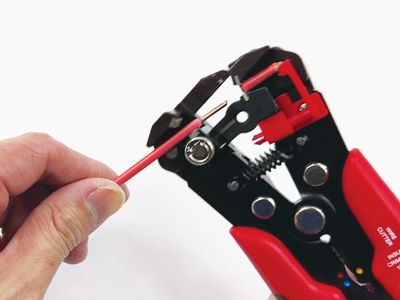
Wire strippers have gauged cutting slots for different wire sizes. Select the correct gauge for the wire you're using, insert the end of the wire into the stripper, and gently squeeze to score the insulation, then pull it off. Inspect the wire; if you notice any strands have been cut or damaged, switch to a larger gauge slot. Now, use the wire strippers to remove 11 to 20 mm (0.43 to 0.75 inches) of insulation from the end of each wire, adjusting the length according to the connector you plan to use.
Step 6:
Connecting the Wires: Once all the wires have been stripped, start by connecting the bare copper or green-insulated ground wires. If you're using a metal box, add a pigtail (a 6-inch length of the same type of ground wire) to the other ground wires and connect it to the ground screw inside the box.

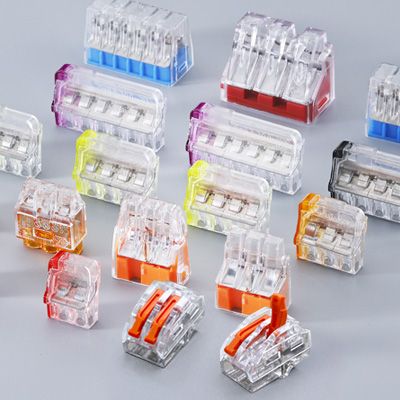
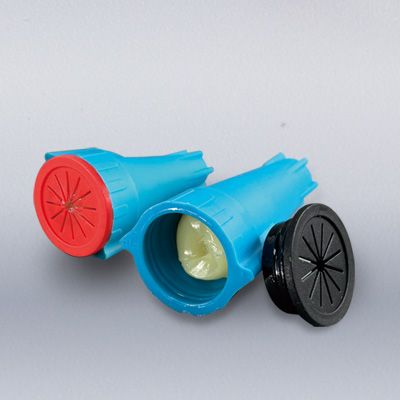
For connecting wires, you can choose from traditional and economical twist-on wire nuts, easy-to-install push-in connectors, or weatherproof connectors, all of which Hua Wei Industrial offers as safe and reliable products. Below is an explanation of these products and their wiring methods.
| Most Economical Choice - Wire Nuts | Simplest and Most Time-Saving Choice - Push-In Connectors | Most Weather-Resistant Choice - Waterproof Wire Connectors |
 |
 |
 |
|
|
|
Ensure that the connectors you choose are rated for the appropriate AWG and capacity, as indicated on their packaging. For example, an orange wire nut is rated for a minimum of two 18-AWG wires and a maximum of three 16-AWG wires, while push-in connectors accommodate one wire per port. After connecting the ground wires, connect the neutral (white) wires, followed by the hot (black) wires, using twist-on wire nuts or push-in connectors that meet safety standards. If there are any red (hot) wires, connect those as well. Once all wires are connected, gently tug on each wire to ensure they are secure with no loose connections. Carefully fold the connected wires back into the junction box, install the cover plate, and secure it with two screws.
Step 7:
Finally, restore power to the circuit by turning on the circuit breaker and check to ensure your connections are functioning properly.
If you want to learn more about the applications of residential junction boxes and industry requirements, or if you’re looking to better understand wiring arrangements before beginning your interior design project, please click on our Residential Junction Box Application Article or Contact Hua Wei Industrial for more valuable information and products.
New Product
Featured product
 Hot
Hot
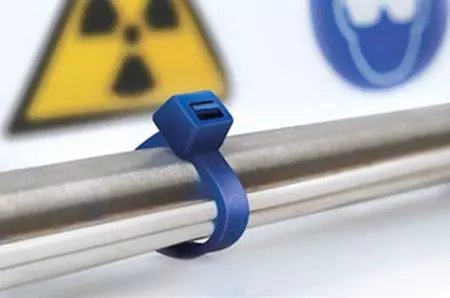
Stainless Steel Ties
Hot
Stainless Steel Ties
With high resistance to various corrosive agents such as acids, alkali, UV, and rust, …
Read More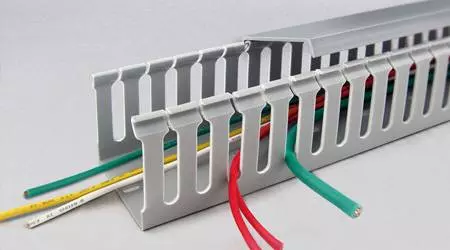 Hot
Hot
Wire Ducts
Hot
Wire Ducts
The premium solution for routing and hiding wires in control panels.
Read More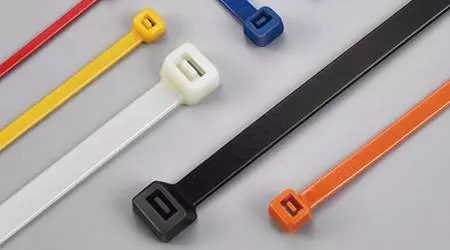 Hot
Hot
Standard Cable Ties
Hot
Standard Cable Ties
Available materials include heat stabilized, weather resistant and flame retardant polymers,...
Read More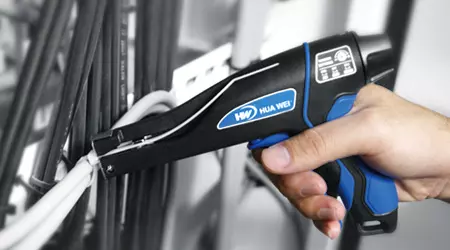 Hot
Hot
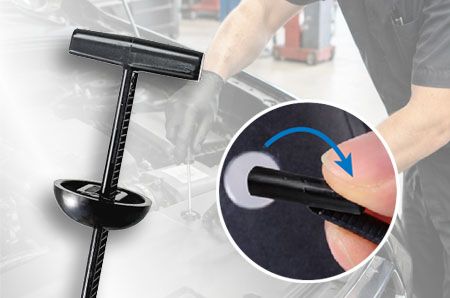
(GIT-703) Cable Tie Tensioning Tool
Hot
(GIT-703) Cable Tie Tensioning Tool
The new cable tie installation tool can fasten and cut nylon cable ties quickly & safely
Read More